Comparison between Industrial CT Testing and X-ray Testing
Release time:2023-11-17Publisher:Jeenoce
Since the discovery of X-rays by German physicist Roentgen in the late 19th century, X-rays were first used for medical diagnosis, but were soon also applied in fields such as non-destructive testing. For over 100 years, the imaging tube at the X-ray emitting end has not undergone significant changes, but the receiving end has been developing. From early film to computer CR imaging, and now to digital DR imaging, all belong to two-dimensional X-ray imaging, among which film is still widely used in many occasions.
CT equipment was produced in the 1970s, but its concept can be traced back to the contribution of Austrian mathematician Radon in the 1920s. British electronic engineer Hensfield successfully developed the world's first medical clinical CT system in 1967, and CT technology began to shine brightly from then on. Industrial CT technology originated from medical CT and emerged in the late Cold War. The United States first used industrial CT equipment developed by the United States to perform non-destructive testing on key components of military products. Due to the promotion of military demand, it has been vigorously developed. The research on industrial CT in China is relatively late. In 2003, Germany's YXLON acquired industrial CT imaging technology and sold China's first industrial CT equipment. In recent years, domestic scholars have conducted research on CT imaging, including CT standard equipment, CT imaging methods, desktop CT equipment, and explored the possibilities of CT imaging technology in more fields such as tree detection.
With the development of technology, especially the development and improvement of receiver (detector) technology, the speed of 2D X-ray imaging is becoming faster and faster. Film usually takes 8-20 minutes from exposure to film imaging, CR is shortened to 1-3 minutes, and DR is further shortened to about 1 second.

At present, a large amount of research on two-dimensional X-ray imaging is concentrated in the DR field, and research on X-ray imaging technology has also made progress and the latest applications, such as aluminum castings, cables, chips, PCB boards, etc. In recent years, the core device of X-ray DR imaging, flat panel detectors, has achieved large-scale, high-definition, and high frame rate. For example, Varex's latest flat panel can achieve a total area of 409.6 millimeters X 409.6 millimeters with a pitch of 100 micrometers. I believe that with the development of X-ray digital imaging equipment and technology, the application of two-dimensional imaging technology will become increasingly widespread.
However, the drawbacks of two-dimensional X-ray imaging are also evident, mainly manifested in the following aspects:.
1. Due to the currently recognized upper limit of imaging sensitivity of 1%~0.5%, its ability to detect small defects is poor and limited.
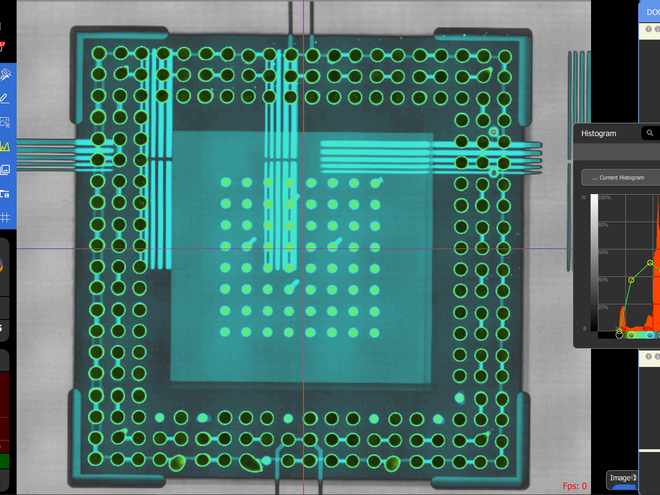
2. X-ray two-dimensional imaging is superimposed imaging, where the influence of materials on the imaging along the ray penetration path is reflected at the same pixel at the end of the path. Therefore, if the tested object is thick and structurally complex, defects may be invisible.
3. It is often necessary to conduct a comprehensive examination of the inspected object in a short period of time. It is necessary to constantly move and rotate objects to observe whether there are defects from different angles, which may require more time for the final actual examination than CT examination.
4. The biggest drawback is that the detection results of two-dimensional X-ray imaging are difficult to quantify, mainly due to the lack of depth information and the inability to obtain accurate size information.
Compared to two-dimensional X-ray imaging, industrial CT imaging has the following advantages:
1. In specific modes, CT has high efficiency and can obtain a large amount of information in a short period of time. Samples can be evaluated with just a few minutes of rapid scanning.
2. CT obtains three-dimensional data, which is more accurate than ordinary two-dimensional X-ray imaging. Therefore, the test results are more complete, accurate, reliable, and most importantly, quantifiable, measurable, with extremely high accuracy.
Of course, CT imaging also has some drawbacks:.
1. CT single scan imaging speed is not as fast as two-dimensional imaging.
2. Fast CT imaging has certain requirements for the upper limit of the size of the object being tested.
At present, the industry is still ongoing research on rapid CT imaging of large objects. If imaging speed is not considered, the upper limit of object size for CT imaging and 2D X-Ray imaging is consistent. Compared to two-dimensional X-ray imaging, CT images can summarize relevant data on internal defects, including the three-dimensional coordinates, diameter, porosity and other detection indicators of each defect. They can quantitatively analyze defects and are more conducive to comprehensive and accurate control of the manufacturing process and product quality.
To perform two-dimensional X-ray imaging of the sample, it is necessary to rotate or translate the sample to different positions to capture multiple images. Some defects can be faintly seen in multiple two-dimensional images, but their specific location and size cannot be determined, and there are omissions.
In practice, if users do not require precise quantitative analysis, they can also quickly and easily see internal defects from sliced images. After comparison, the CT imaging of the same sample can clearly see a large number of internal defects at different slice positions, and the CT imaging effect is significantly better than two-dimensional X-ray imaging. That is to say, CT imaging media defects are clearly visible and can be used for quantitative analysis of data; Defects in two-dimensional X-ray imaging are invisible or difficult to see, cannot be quantitatively analyzed, and are easily missed.
So, in summary, two-dimensional X-ray is an important traditional non-destructive testing method. It mainly utilizes the penetration ability of X-rays to perform non-destructive imaging of the interior of objects. Due to factors such as stacking on the board, there are inevitably shortcomings such as limited detection capabilities and inaccurate measurement of defect sizes. In many cases, defects are not easy to see or even invisible.

